Cogs and Gears
The Patterning has a small library (machines) that currently helps create cog-wheels that mesh together. This can be used to make "steampunk" patterns. Or even to design cog wheels for fabrication
The main functions are:
make-cogto define a cog-wheel,cog->patternto turn that cog into a drawable pattern,spaced-engagedto make another cog positioned so that it meshes with the first at a given ratio.gear-trainto build an exact train of cog records from rotational ratios. Use this for more serious "engineering" designstrain->patternto render such a train as a Patterning pattern. It can also take layout options for fabrication previews.layout-trainto space a train out for laser-cutting, 3d printing, or export when you want the laid-out cog records themselves.
A cog itself is not yet a Patterning pattern. It is a record describing the geometry of the wheel. To see it, we pass it to cog->pattern.
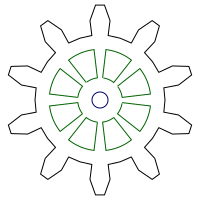
(def A
  (make-cog 0 0 10 0.8 0.15 0.15 0.04 0.4 0.15 :round 0.08 8 0.5))

(cog->pattern A false)
make-cog takes a lot of arguments because cogs have to be quite finely shaped to engage each other
(make-cog cx cy
          no-teeth pitch-radius addendum dedendum clearance
          tooth-thickness top-thickness
          hole-type hole-radius
          no-hollows hollow-radius)
Here's what they all mean
cx,cy- centre position of the cog,no-teeth- number of teeth,pitch-radius- working radius of the gear,addendum- height of the tooth above the pitch circle,dedendum- depth of the tooth below the pitch circle,clearance- extra clearance below the mating tooth,tooth-thickness- proportion of each tooth slot occupied at the pitch circle,top-thickness- proportion of each tooth slot occupied at the tooth tip,hole-type-:roundor:square,hole-radius- radius of the centre hole,no-hollows- number of decorative hollows inside the gear,hollow-radius- size of those hollows.
The most important ones to experiment with at first are:
no-teeth- how many teeth the cog has,pitch-radius- roughly the working size of the cog,hole-type- either:roundor:square,no-hollows- how many decorative hollows appear inside,hollow-radius- how large those hollows are.
cog->pattern also takes a boolean flag. If it is true, Patterning draws guide circles to show the pitch, addendum and dedendum radii.
Note that for make-cog and other cog related functions, unlike normal Patterning patterns, we assume that the sizes are in a real world unit such as mm or inches. Even cog->pattern preserves these rather than automatically converting them. This means you may end up with a design which goes outside the usual Patterning viewport of -1,-1 to 1,1. If you need to scale it back for visualisation, just use reframe.
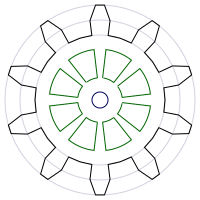
(def A
  (make-cog 0 0 10 0.8 0.15 0.15 0.04 0.4 0.15 :round 0.08 8 0.5))

(cog->pattern A true)
Cogs that fit together
spaced-engaged makes a second cog using the same tooth geometry as the first so that the teeth mesh. It's placed directly alongside the first. These two cogs are NOT engaged in the image. (For that they'd need to be a bit closer and rotated.) However this image is suitable to be converted for use in laser-cutter or 3D printer design software.
The placement preserves the same units you used to define the cog.
Here we ask for a cog with twice as many teeth as the original. (A 2/1 ratio)
(let [A (make-cog 0 0 10 0.8 0.15 0.15 0.04 0.4 0.15 :round 0.08 8 0.5)
      B (spaced-engaged A 2/1)]
  (reframe
    (stack
      (cog->pattern A false)
      (cog->pattern B false))))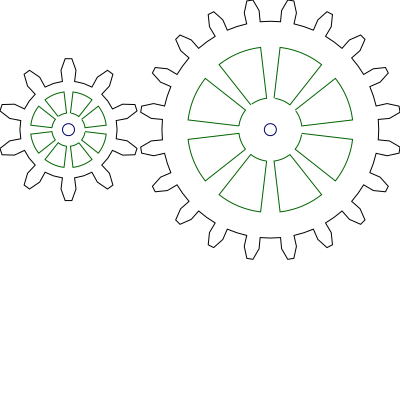
Because the second cog is created from the first, they share the same circular pitch and tooth proportions. That is what makes them fit together properly.
We can also ask for guide circles on one of the wheels to see the geometry more clearly.
(let [A (make-cog 0 0 10 0.8 0.15 0.15 0.04 0.4 0.15 :square 0.08 8 0.5)
      B (spaced-engaged A 2/1)]
  (stack
    (rect -1 -1 2 2 {:fill (p-color 255)})
    (reframe
      (stack
        (cog->pattern A false)
        (cog->pattern B true)))))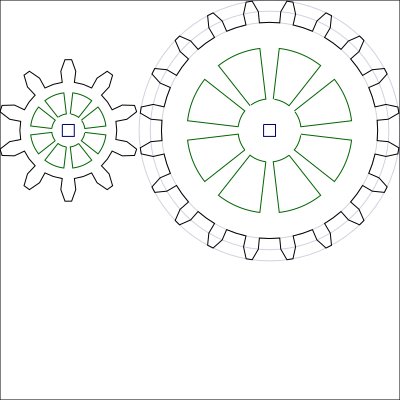
Because each new cog is positioned relative to the actual centre of its parent, chained calls build a real gear train rather than collapsing back toward the origin.
(let [A (make-cog 0 0 8 0.6 0.12 0.12 0.03 0.45 0.18 :round 0.08 6 0.5)
      B (spaced-engaged A 3/1)
      C (spaced-engaged B 1/2)]
  (reframe
    (stack
      (cog->pattern A false)
      (cog->pattern B false)
      (cog->pattern C false))))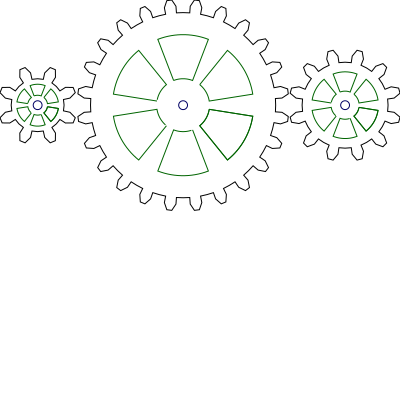
Gear Trains
For decorative work, spaced-engaged is still a convenient helper. But for fabrication-oriented work, gear-train is the safer abstraction because it chooses an exact integer-tooth train from the requested rotational ratios and a minimum tooth-count constraint. It tries to calculate other values for the cogs based on these crucial paramaters. But as that can lead to cogs with impossibly small rims, it can also enforce :min-rim-thickness, which keeps a minimum band of material between the centre hole and the tooth roots on the smallest gears. :min-rim-thickness is often as important as the ratio itself, because it stops very small gears from degenerating into little more than teeth around a hole.
gear-train returns a list of cog records, and train->pattern converts them to a drawable pattern when you want to preview them on screen. For convenience, train->pattern can also accept layout options such as :min-gear-gap. If you want the laid-out cog records themselves for further processing, use layout-train directly.
(let [train (gear-train {:min-teeth 8
                         :pitch-radius 0.6
                         :addendum 0.12
                         :dedendum 0.12
                         :clearance 0.03
                         :tooth-thickness 0.45
                         :top-thickness 0.18
                         :hole-type :round
                         :hole-radius 0.08
                         :no-hollows 6
                         :hollow-radius 0.5
                         :min-rim-thickness 0.08}
                        [3/1 2/1])]
  (reframe
    (train->pattern train false)))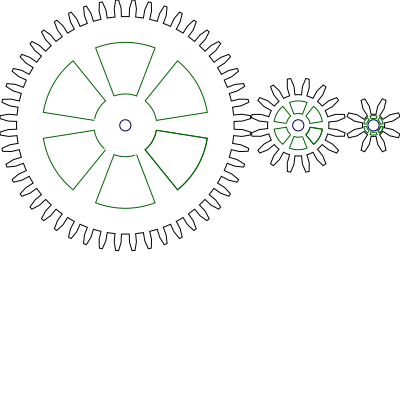
(let [train (gear-train {:min-teeth 8
                         :pitch-radius 0.6
                         :addendum 0.12
                         :dedendum 0.12
                         :clearance 0.03
                         :tooth-thickness 0.45
                         :top-thickness 0.18
                         :hole-type :round
                         :hole-radius 0.08
                         :no-hollows 6
                         :hollow-radius 0.5
                         :min-rim-thickness 0.08}
                        [3/1 2/1])]
  (reframe
    (train->pattern train {:guides? false
                          :min-gear-gap 0.15})))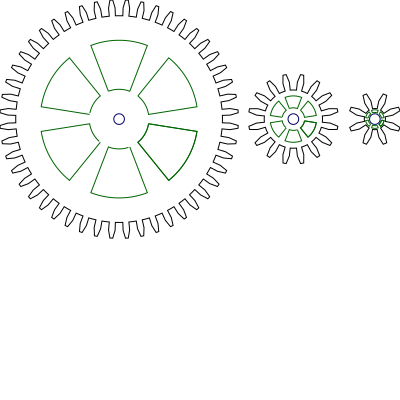
At the moment this part of Patterning is mainly about generating cog shapes that fit together visually. But it is now also a better starting point for workflows where the coordinates correspond to real units and the resulting gears may be sent on to fabrication tools. In those workflows, train->pattern can apply a simple fabrication gap directly, while layout-train remains available when you want the separated cog records themselves for export or further transformation.
Continue to Trochoids and Spirographs